|
At the brainstorming phase of this project, I listed some inquiry questions that would drive my learning. For this reflection I will return to these questions and provide some tentative answers.
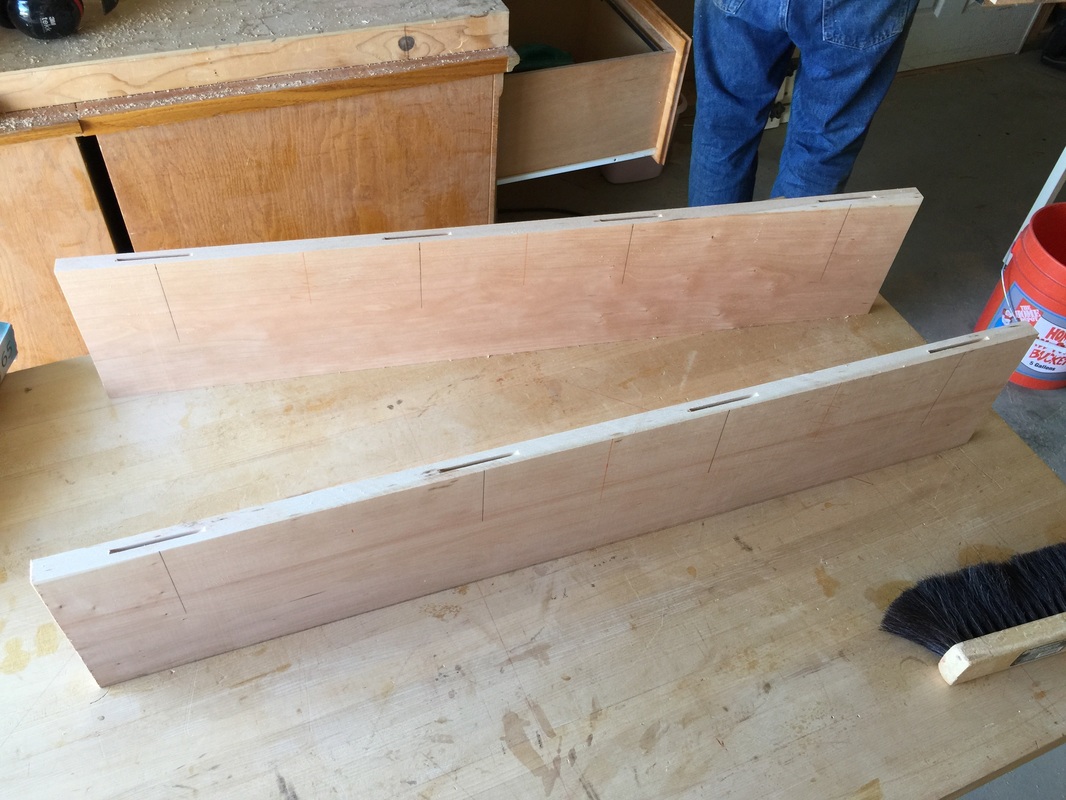
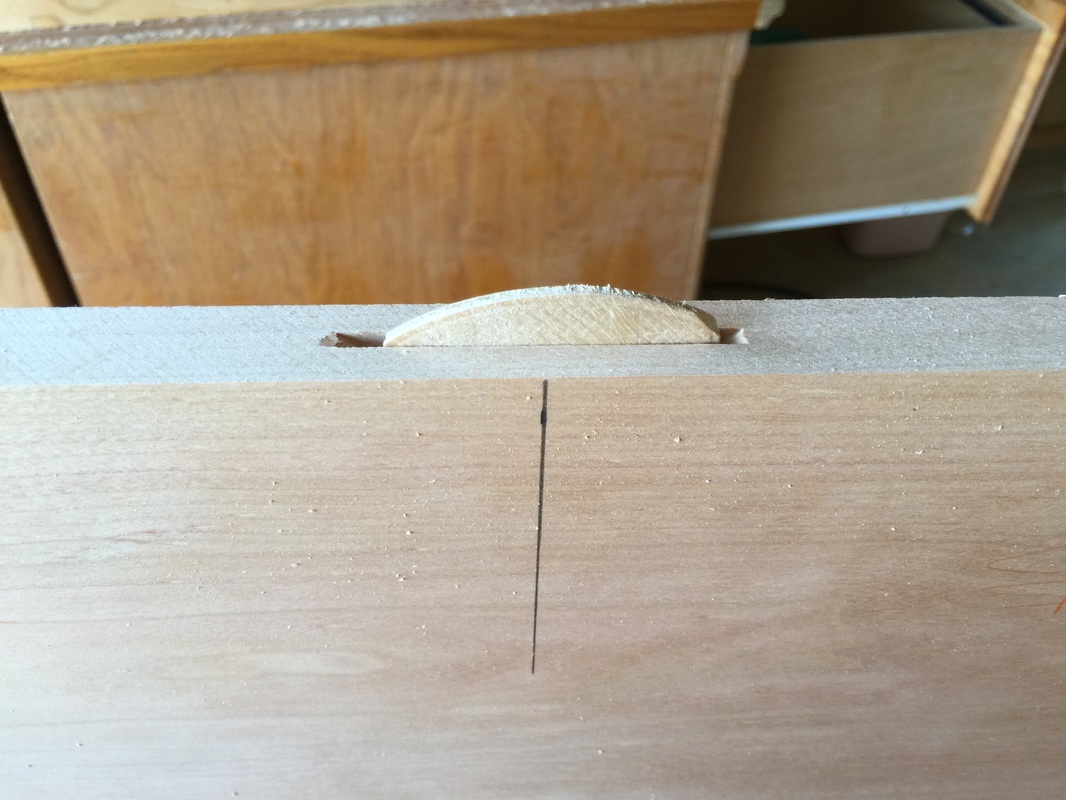
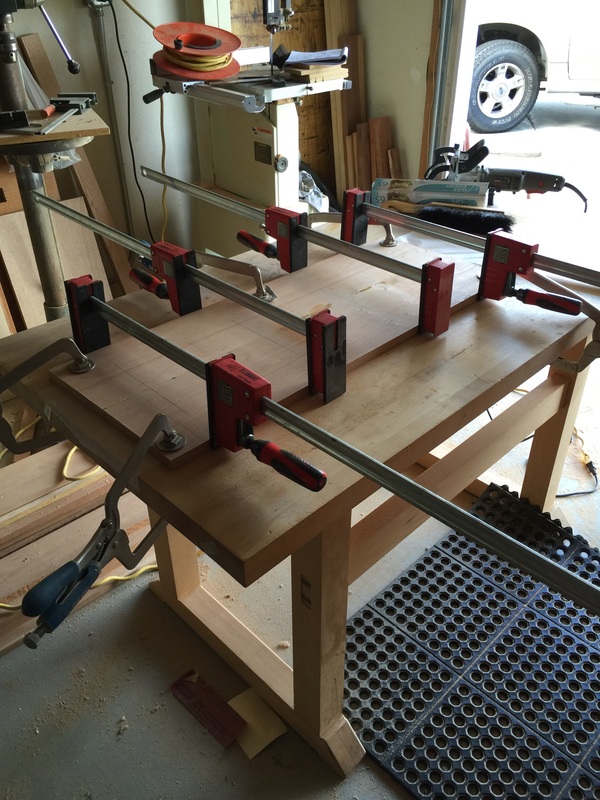
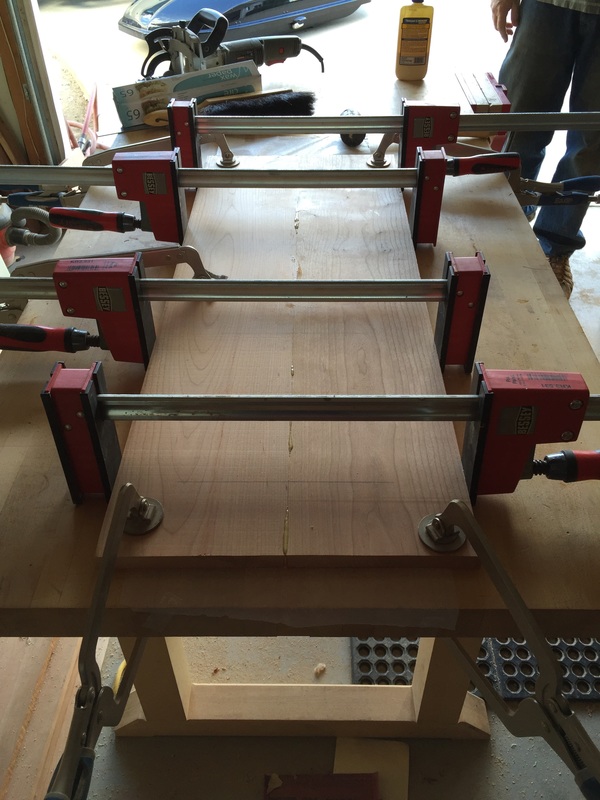
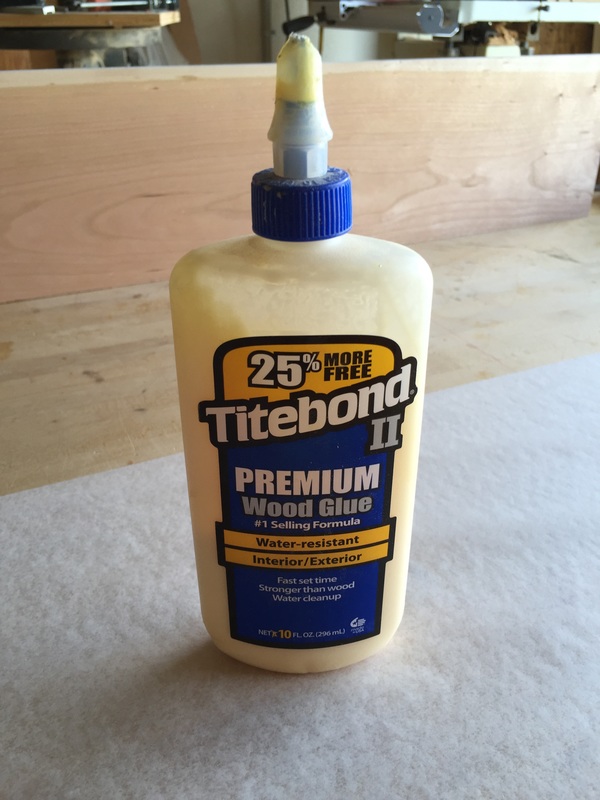
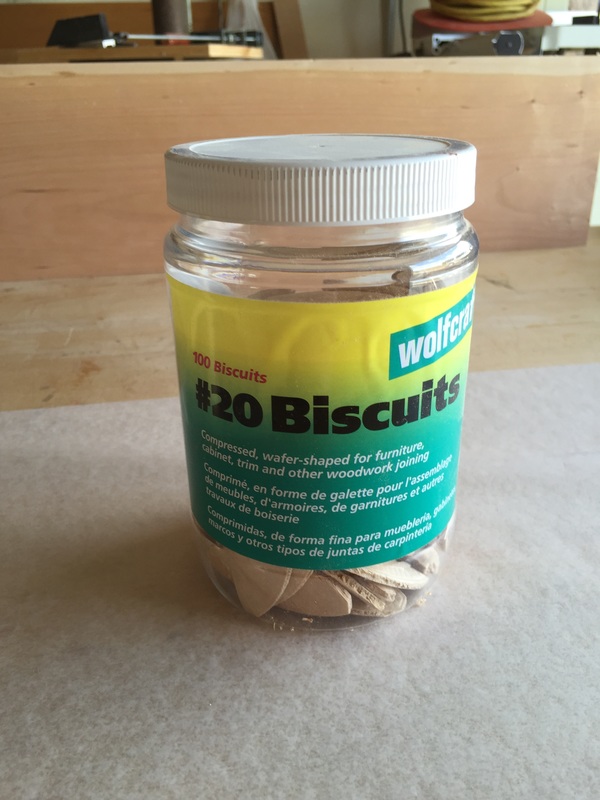
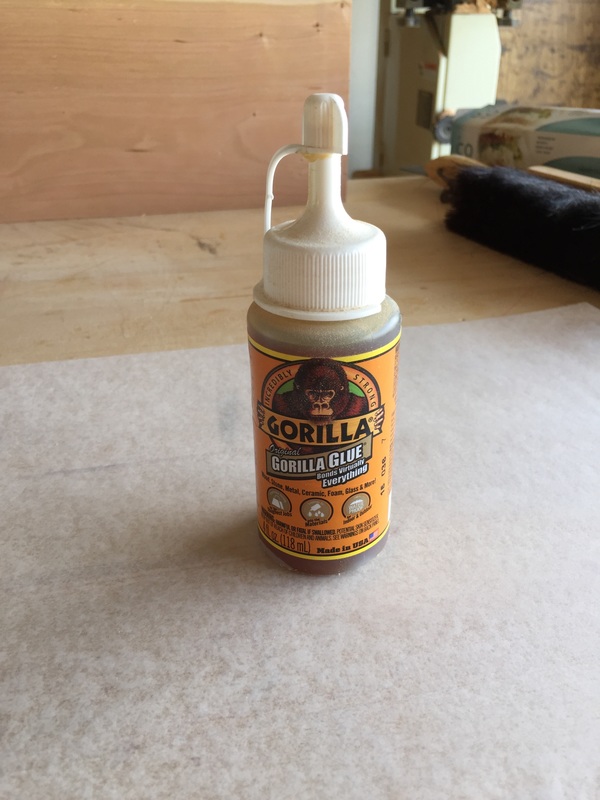
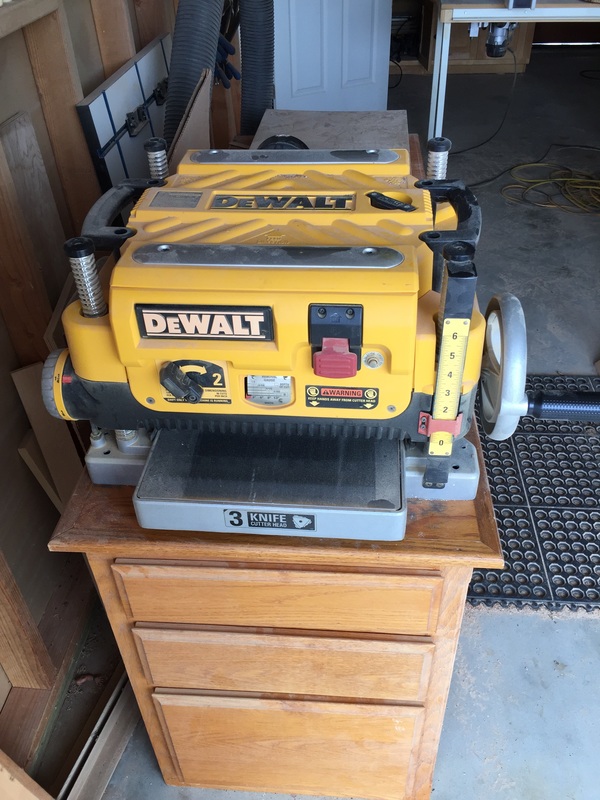
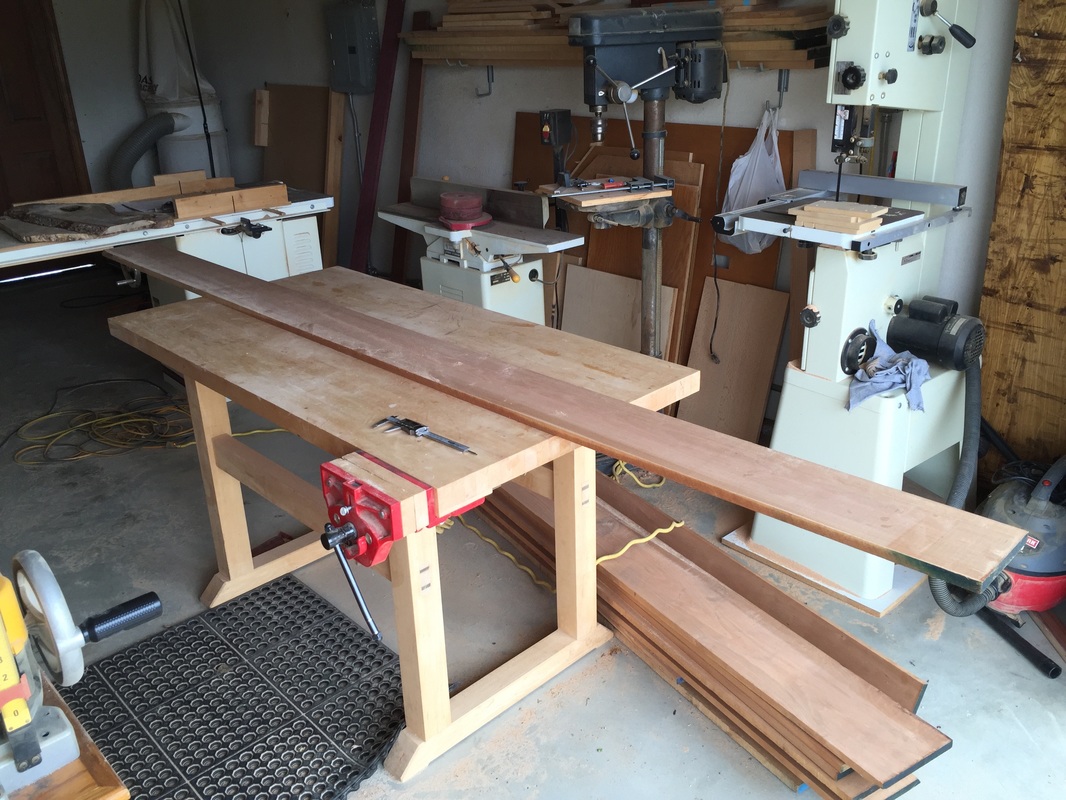
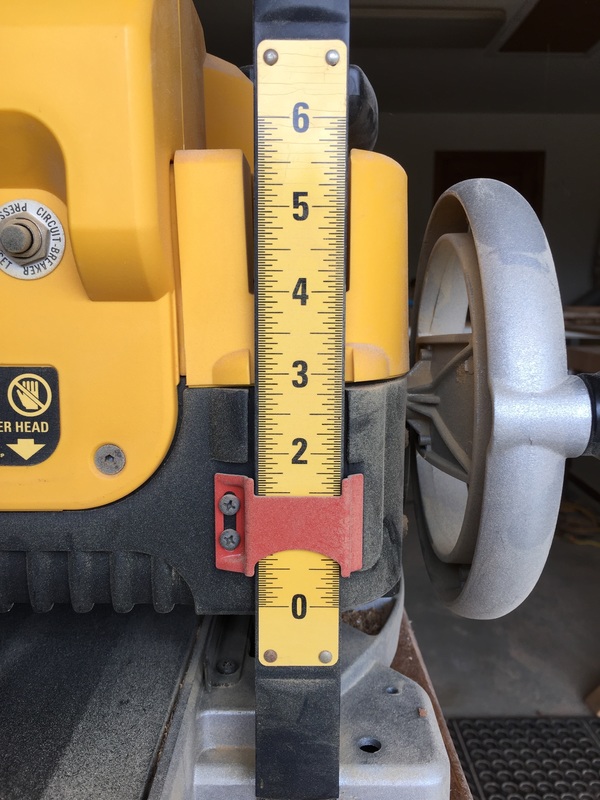
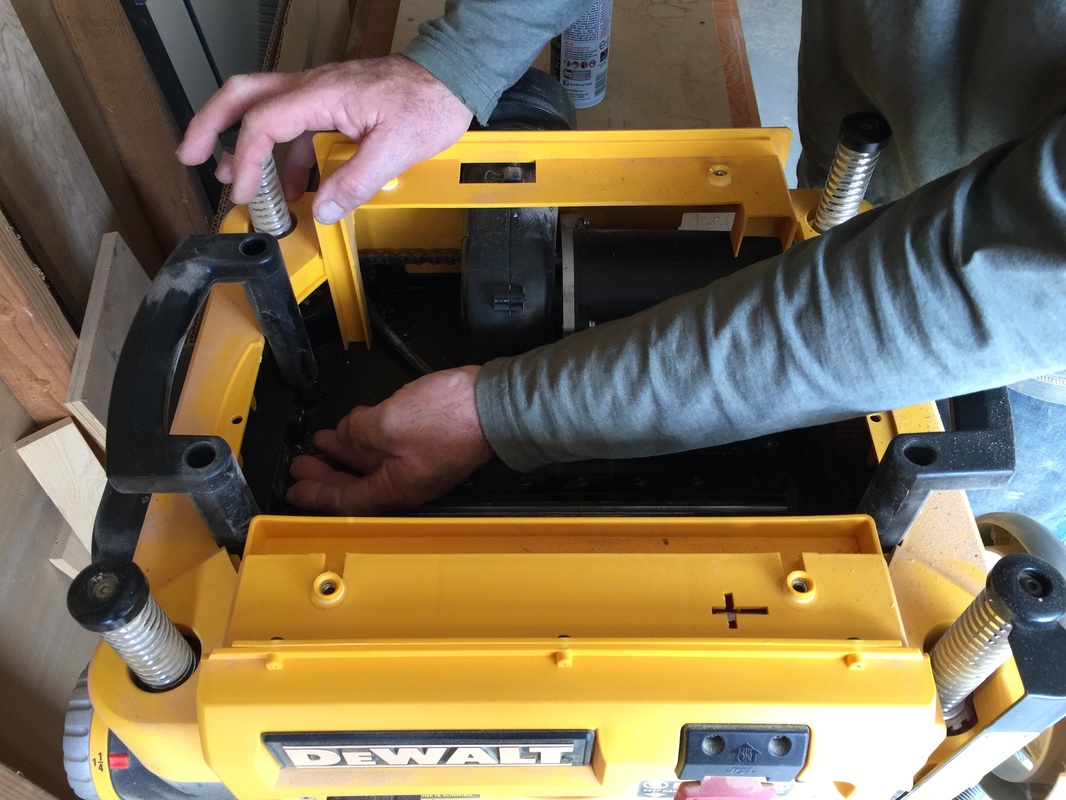
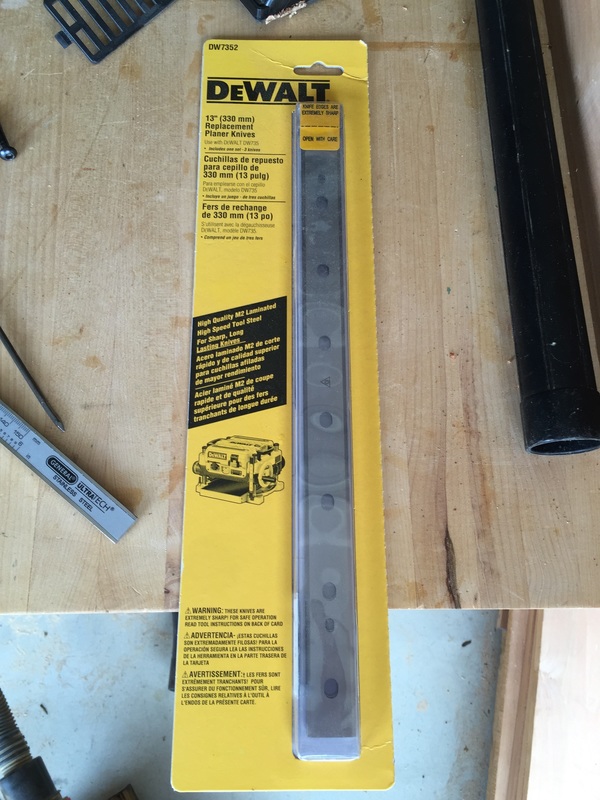
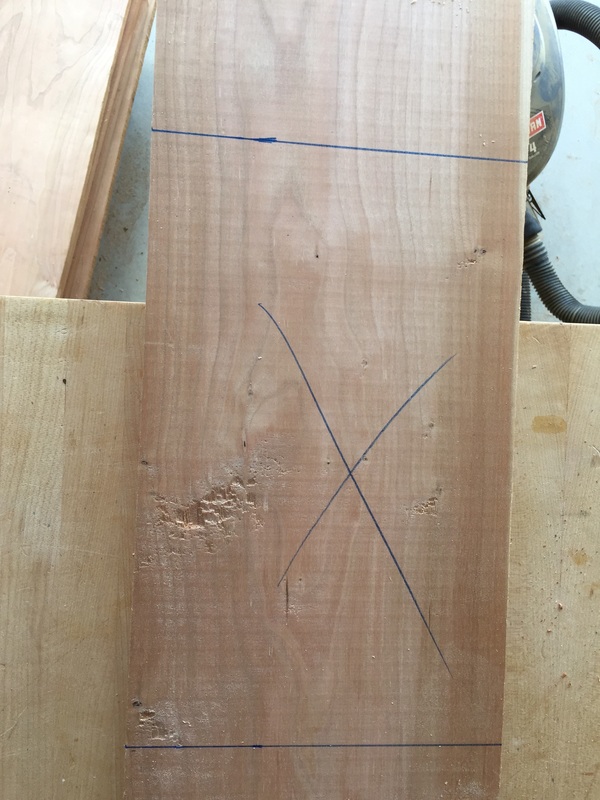
1. How will I measure my abilities? The easiest way to measure my abilities during this project was through repetition and improvement. For example, I was uncomfortable using the surfacer at first because I did not want to ruin the boards or the machine. However, after watching videos, receiving advice from my dad, and working with the machine repeatedly, I gradually became more comfortable with my abilities. The outcomes were better as well, so I had evidence that my abilities were increasing. 2. How will I ensure I am participating in genuine learning? I think when I wrote this question that it would be difficult to answer, but upon reflection it is pretty simple. I learned a ton throughout this project about woodworking and also how I learn. I am realizing that I have become more of a visual learner over time, but ultimately I need to get my hands on something to learn it genuinely. This project supported the hands-on learning, so I know it was genuine for my learning style. 3. How much time will I devote each week to my project? The edTPA break and stress really disrupted my devotion to this project. I started out really strong and then fizzled for about a month. I did not devote the time I wanted to each week, but I pretty much accomplished the tasks I wanted to, e.g. get the wood, design the bookcase, and start the work. 4. How will I supplement my learning? I supplemented my learning by watching videos and talking to my dad about woodworking. I explored websites and researched best practices. 5. How will I stay on track with my schedule? This question is still open because I did not stay on track with my schedule. I think if I just made the time each week I would have been on track, but I felt extremely weighed down by stress from my site and the edTPA. Since I am going to continue working on my bookcase, I will try to update this later. 6. How will I apply my learning to my teaching practice? This project supports the belief that the one doing the work is doing the learning. It reinforced for me that students need to be working and thinking. It was only when I was in the workshop with wood or a machine in my hands that I truly embodied the learning. 7. What are the soft skills I hope to acquire from this project? I would like to say I persevered through this project, but the edTPA really set me back. I hope I can revisit this question with better answers in the future. 8. When will I apply the knowledge I acquire from this project? I plan on making many more projects and hopefully having a shop of my own one day. The real challenge will be keeping the knowledge fresh. 9. Where are more resources for this project? The Internet. There are videos, entire websites, and manuals all online. My dad was a huge resource for this project as well. Nothing beats having an enthusiast at the shop. 10. How can I collaborate with others to accomplish this project? I collaborated with my dad on this project as far as feedback on the design and help with the process. I am indebted to my house members as well for their support and feedback. 11. Where are there communities I can join for help with this project? I did not end up finding communities to help with the project. Doing so would be the next step to becoming an authentic member of the woodworking community. 12. How can I implement play into this project? I definitely played with the design, but I must admit I was hesitant to make mistakes due to the cost. I think when I become more confident with the work I can implement more play into future projects. This week I transitioned from planing the boards to sawing and gluing. I must admit these processes overlap, but I am sure you heard enough about planing! Anyways, after using the planer to produce the desired thickness for the boards (0.75"), I moved to sawing. Before actually sawing, I had to measure (twice, of course). I looked back at my trusty design and measured accordingly. I made some changes along the way that I will not go into, but suffice it to say that the project was much different once I got my hands on it. The boards I am focusing on for this post will compose one of the shelves (see Week #3 for the design). I measured the boards out by measuring from the edge with a tape measure and marking the right lengths. I used a level-ruler to make the line perpendicular to the sides of the board. Then, I used a handsaw to cut the boards. After cutting the length, I had to "rip" the boards. My dad helped me learn to use three jigs for this process. (I will post pictures of them in the future.) The first jig ensures that the board does not jump up from the blade. Essentially it clamps down the board and then you push the board through the table saw. The second provides a straight side with which to make a board with two crooked sides straight along the length. The third jig moves a board across the table saw widthwise and evenly. After ripping the boards, I had four boards ready to go. Then the fun began! I have to glue the boards, but I will not just be using glue. Instead, I will use a process called biscuiting or plane joining. To do this process, I had to use a plane joiner, which I have never used before. I performed a test run with this tool, then was ready to try the real deal. The blade for the plane joiner is curved and needs to be driven into the side of the boards that will be glued (see photos below). Both boards that I glued for this post have lines drawn where the biscuits will go. I line up the plane joiner at those lines on the boards and drive the blade forward with my hand while holding the trigger for power. The process is easier than it sounds, but I was definitely afraid I would ruin the boards! The final part of this process was the actual gluing. I taped down wax paper to the table so that the boards would not be glued to it. Then, I used two different glue types at my dad's advice. I had planned on just using wood glue, but he said the gorilla glue works better for the planes while the wood glue is good for the notches. Prior to applying the glue, I wetted down the wood so that it does not dry out and crack. I applied the glue and left it to stand for two minutes. Then, I connected the boards with biscuits and glue. The final, final step was to clamp the boards together. I used four parallel clamps (red) to clamp the boards together and four face clamps (blue) on the edges to keep the boards from moving on the table. You might be able to see in the photos that the boards are not exactly the same length. They should not shift during gluing, which takes about two hours to dry, but in any case I will be cutting the boards to the same length after gluing them together. It makes no sense to have the same length prior to gluing simply because it is difficult to line them up by hand. The better route is to leave a couple inches extra and line them up perfectly with an incredibly sharp blade. After a hiatus for edTPA, I starting working again on my bookcase. The going has been slow mostly because I do not want to screw up the boards I purchased. I passed a sign at one of the local schools today that said failure is the path to success if only you will learn from it, something like that at least, but failure does not really feel like an option when I am broke and paying thousands of dollars to spend 50-60 hours of my week on everything but this project; and if I screw up a board I go even more into debt.The stakes are high! Anyways, I have been sanding and surfacing boards to get them down to 0.75" thickness. I need to get all the boards to the same thickness or else the bookcase is going to look worse than the IKEA one I am trying to replace! I watched some videos on sanding to refresh my memory. I learned a great deal about different types and uses of sanding from this video. I knew about the different grits of paper and basic techniques, but this video helped focus on efficiency. I needed a refresher on planing/surfacing as well. I watched this video and this one to activate those long-since-used schema on how not to butcher the boards. All in all, the going is much slower than I wanted it to be, but I am chugging along. I will try to do some actual sawing before this project is over, but we will see. Thanks for reading! Edit: Here are some photos and a video from my second round of surfacing. I had to clean the surfacer too, which was definitely a learning experience! The third week of my 20time Project revolves around the design. I searched on Pinterest for ages to find interesting designs, but ultimately I reverted back to a simple plan. I chose simplicity because I am an amateur. I figured that I should save the novel designs for future projects! In any case, my design is featured in the photograph below. 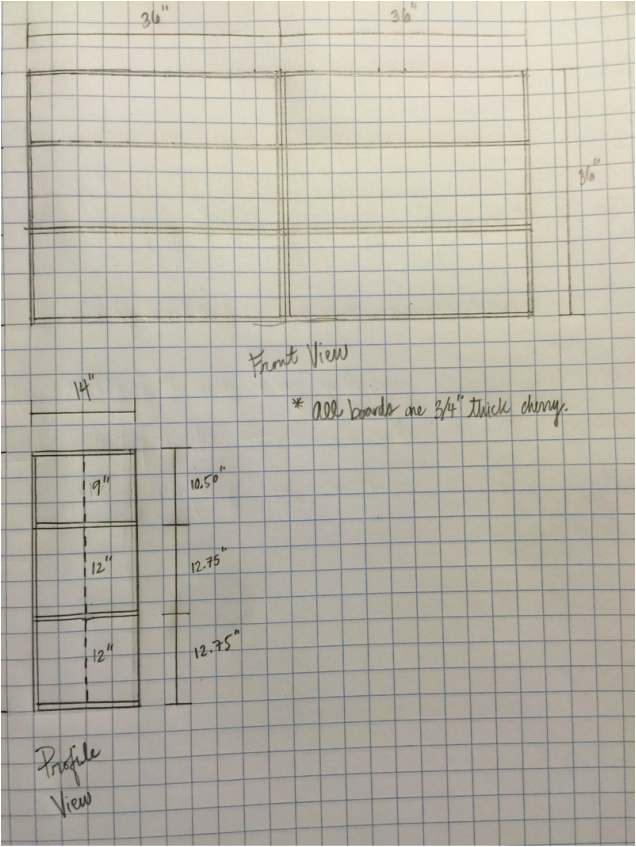 I stuck with the long and low design because I am going to situate the bookcase underneath a window. The window is roughly 6' wide and about 3' from the carpet, thus the measurements of the bookcase! The bookcase will extend a little past the edges of the window and about 1/2" above the windowsill. The main challenge of the design is keeping in mind the thickness of the boards (3/4"). The actual case will be 72"x36", but the books will not have all that room to inhabit. I have to dock the thickness for each shelf, plus the top and bottom boards. Since the design calls for two adjustable shelves, I have 3/4" * 4 to account for as far as the height. That leaves 33" of space for the books, which I split into two 12" spaces and one of 10". I have to dock 3/4" for each of the sides, plus I will have two boards dividing the bookcase in the middle for added stability. Once again, these will be 3/4" * 4, so I only have 33" of width with which to add books.
I came up with the measurements for the bookcase based on the placement of the case and the size of my books. Since the main purpose of the bookcase is to store educational books, I needed extra height and width. As opposed to, say, novels, educational books are typically 8.5"x11". The 12" space will work great for these books. I chose the depth of 14" because I have ERWC folders that are 12" wide. Finally, I decided to go with three shelving areas for books so that I could fit smaller books or trinkets on the top level. Most smaller books are 8-9" tall, so this space of 9" should be perfect. Anyways, this is my learning for the week. I look forward to actually getting to surfacing and cutting in the next installment! The second week of my 20time project consisted of making a final decision on the type of lumber I wanted to work with and then purchasing said lumber. I made the decision to go with cherry for a couple of reasons: namely sturdiness, aesthetics, and cost.
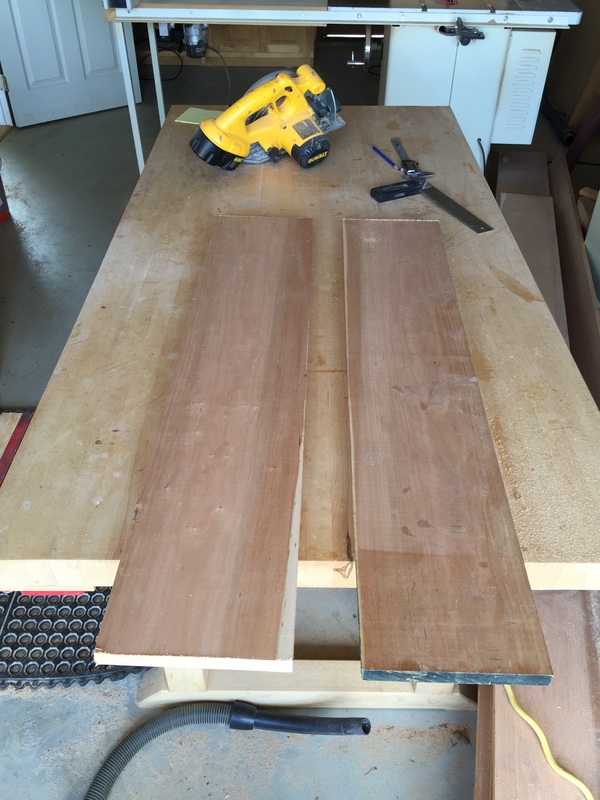
 The main aspect of woodworking I learned about in the second week of my 20time project was selecting wood. The basics of selecting wood are trying to ensure that the wood does not have knots or chatter. (Wood chattering occurs when the piece has vibrated during the initial sawing of the board. It produces dents in the wood which means one has to plane more wood from the board.) These basics amount to two things: wood quality and waste.
To sum it all up, I have the wood for the project, I learned how to choose it, and my project is starting to materialize into reality. My learning for the first week consisted mainly in selecting which wood I will use, researching ideas for the design, and budgeting the cost of the project.
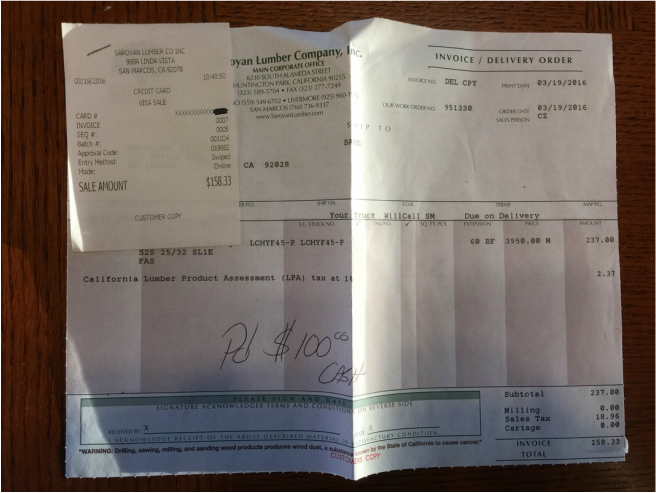
I already had an idea of which wood would be best--best being simultaneously the strongest and cheapest--but I read articles and researched woodworking sites to see where the strength and cost lines intersected. I first read a simple article from SFGate that talked about types of wood to use. I knew that I did not want to use particleboard for my bookcase, so the article served as reinforcement. The main benefit from reading this article was that the author linked to a resource, The Workshop Companion, that provided tons of information about kinds of wood. I narrowed down my options from this website to alder, birch, cherry, maple, oak, and walnut. There were other exotic woods like mahogany and variations of maple and walnut that intrigued me, but ultimately the choice came down to economics. More on that later, but first I need to talk about the design. I started researching designs on Pinterest last week, and I revisited this week to see what else I could find. I learned very quickly a lesson that arises every time I use Pinterest: It is mostly a bunch of kitschy crap. This site is the apotheosis that idea. It reads like a Buzzfeed article and ends up being totally impractical and useless. The whole ordeal reminds me how I listened to The Nerdist podcast interview with Craig Ferguson this week, and how one of the most poignant subjects they discussed was the proliferation of clickbait. Everything is clickbait was their conclusion, meaning that the modalities through which we give and receive information has become purely sensational and superficial. I could go on, but I raise the point in this space because I do not want this project to be sensational or superficial. Perhaps it means going with a more conservative design, but it fosters in me the realization that I need this project to be immanent to its purpose. In other words, because I am building a piece of furniture that will store some of my most prized possessions--prized because they store the most important thing in the world to me, knowledge--going with a bookcase shaped like a coffee cup seems like a betrayal of what I want to get out of this project. So thank you to Pinterest for giving me pins and pages of what I do not want to do. Tune in next week for what I actually want to do! And now I will return to the budgeting issue. I researched a couple lumberyards I know of in San Marcos. The first is San Marcos Hardwood Lumber. The other is Saroyan Hardwoods. I am planning on visiting these yards this upcoming week to do more research into the pricing because their sites are not up-to-date. However, I did learn that I will be paying anywhere from $5.00 to $10.00 PBF (per board foot). The other measurements to keep in mind are that I want boards that are eventually 3/4" thick, which means that I will need to buy 1" boards and surface them down. I also learned this week that boards are measured in thicknesses with base 4, e.g. 1" boards are 4/4", 1.5" are 6/4", etc. (Learning the lingo of woodworking is as important as learning the language of any subject!) I am predicting that I will need 40' to 50' of wood to complete the bookshelf I have in mind. It might be more in fact, depending on if I want to go cheaper with the backboard. So my budget is probably going to be $300-500 depending on how much stain, sand paper, glue, hardware, etc. that I need. Anyways, this concludes my first week of research. I am planning to work on the design and purchasing wood this week to get things started. I will be practicing with surfacing this upcoming Saturday, and I hope to provide a video so this space is not all text! Thanks for reading. :) After some consideration, I have decided to undertake the bookcase project because I think the benefits outweigh those of the coding project. Although I am interested in coding and web design, especially since I can use them in my classroom, I feel that the scope of the woodworking project simply has more breadth and depth. My hope is that the project will provide me with opportunities to work with my hands, make something real, be creative, and spend time with my dad. Due to the stress of the program and the formality of school, I think all of these qualities will be instructive and cathartic. I think woodworking will allow me to play with my learning rather than meet some standard that is out of my hands. I am really looking forward to getting started this week. A rough timeline is as follows:
Week 1: Research bookcase designs, wood types, hardware, etc. using Pinterest Week 2: Design the bookcase and map out the process Week 3: Acquire the materials and practice, research and reflect on improved techniques Weeks 4&5: Main work on the bookcase Week 6: Reflection on (hopefully) finished product Option 1
The first idea for my 20time project is learning to code in JavaScript using the 8 units on Codecademy.com. I have wanted to learn to code in JavaScript for years, so I am treating this project as a structured means of doing so. I will also be using JavaScript: The Definitive Guide by David Flanagan as a supplementary resource. My ultimate goal for this project would be to design the adventure game at the end of the Codecademy.com units. My goal after the project would be to continue learning JavaScript and progress my web design abilities. Inquiries 1. How will I measure my abilities, since the quizzes are only accessible through the Pro subscription? 2. How will I ensure I am participating in genuine learning? 3. How much time will I devote each week to my project? 4. How will I supplement my learning with tools other than Codecademy.com? 5. How will I stay on track with my schedule? 6. How will I apply my learning to my teaching practice? 7. What are the soft skills I hope to acquire from this project? 8. When will I apply the knowledge I acquire from this project? 9. Where are more resources for this project? 10. How can I collaborate with others to accomplish this project? 11. Where are there communities I can join for help with this project? 12. How can I implement play into my project? Option 2 The second idea for my 20time project is to learn to build a bookcase for my education books. I currently have a huge stack of books and no place to put them. I have wanted to build a bookcase to store these books for awhile now, rather than buy a bookcase from IKEA. I have the resources to accomplish this project because my dad built a wood shop after he retired. I think this project has the bonus of not only being useful but also being an opportunity for my dad and I to work on a project together. Plus, I can learn a lot of skills and have the satisfaction of building something on my own. 1. How will I measure my abilities? 2. How will I ensure I am participating in genuine learning? 3. How much time will I devote each week to my project? 4. How will I supplement my learning? 5. How will I stay on track with my schedule? 6. How will I apply my learning to my teaching practice? 7. What are the soft skills I hope to acquire from this project? 8. When will I apply the knowledge I acquire from this project? 9. Where are more resources for this project? 10. How can I collaborate with others to accomplish this project? 11. Where are there communities I can join for help with this project? 12. How can I implement play into this project?
Welcome to my 20TIME Project page. The following is a Google Slides(show) describing the members of House Mighty Beard and their respective projects. I am looking forward to seeing how much learning and progress we can accomplish in five weeks.
|
Archives
May 2016
Categories |

 RSS Feed
